
Electronic Design and Family Site
Homebrew Vertical CW Straight Key
I mostly operate Ham Radio using Morse Code, "CW" for Continuous-Wave in ham radio jargon. While much of the transmission of the code is modernized and sent to the transmitter by my computer, certain events and circumstances require me to send the old-fashioned way...with a hand key!
I'm not getting younger, and arthritis has settled into my hands. While still not terrible, operating a hand key for long periods hurts a bit, and my speed and accuracy aren't what they once were.
On the computer, rather than use a standard mouse, I find it hurts much less to use a vertical mouse, what I like to call a "shark fin". It keeps my wrist in a more natural position on a desktop and forces me to move it with my entire arm rather than just my wrist.
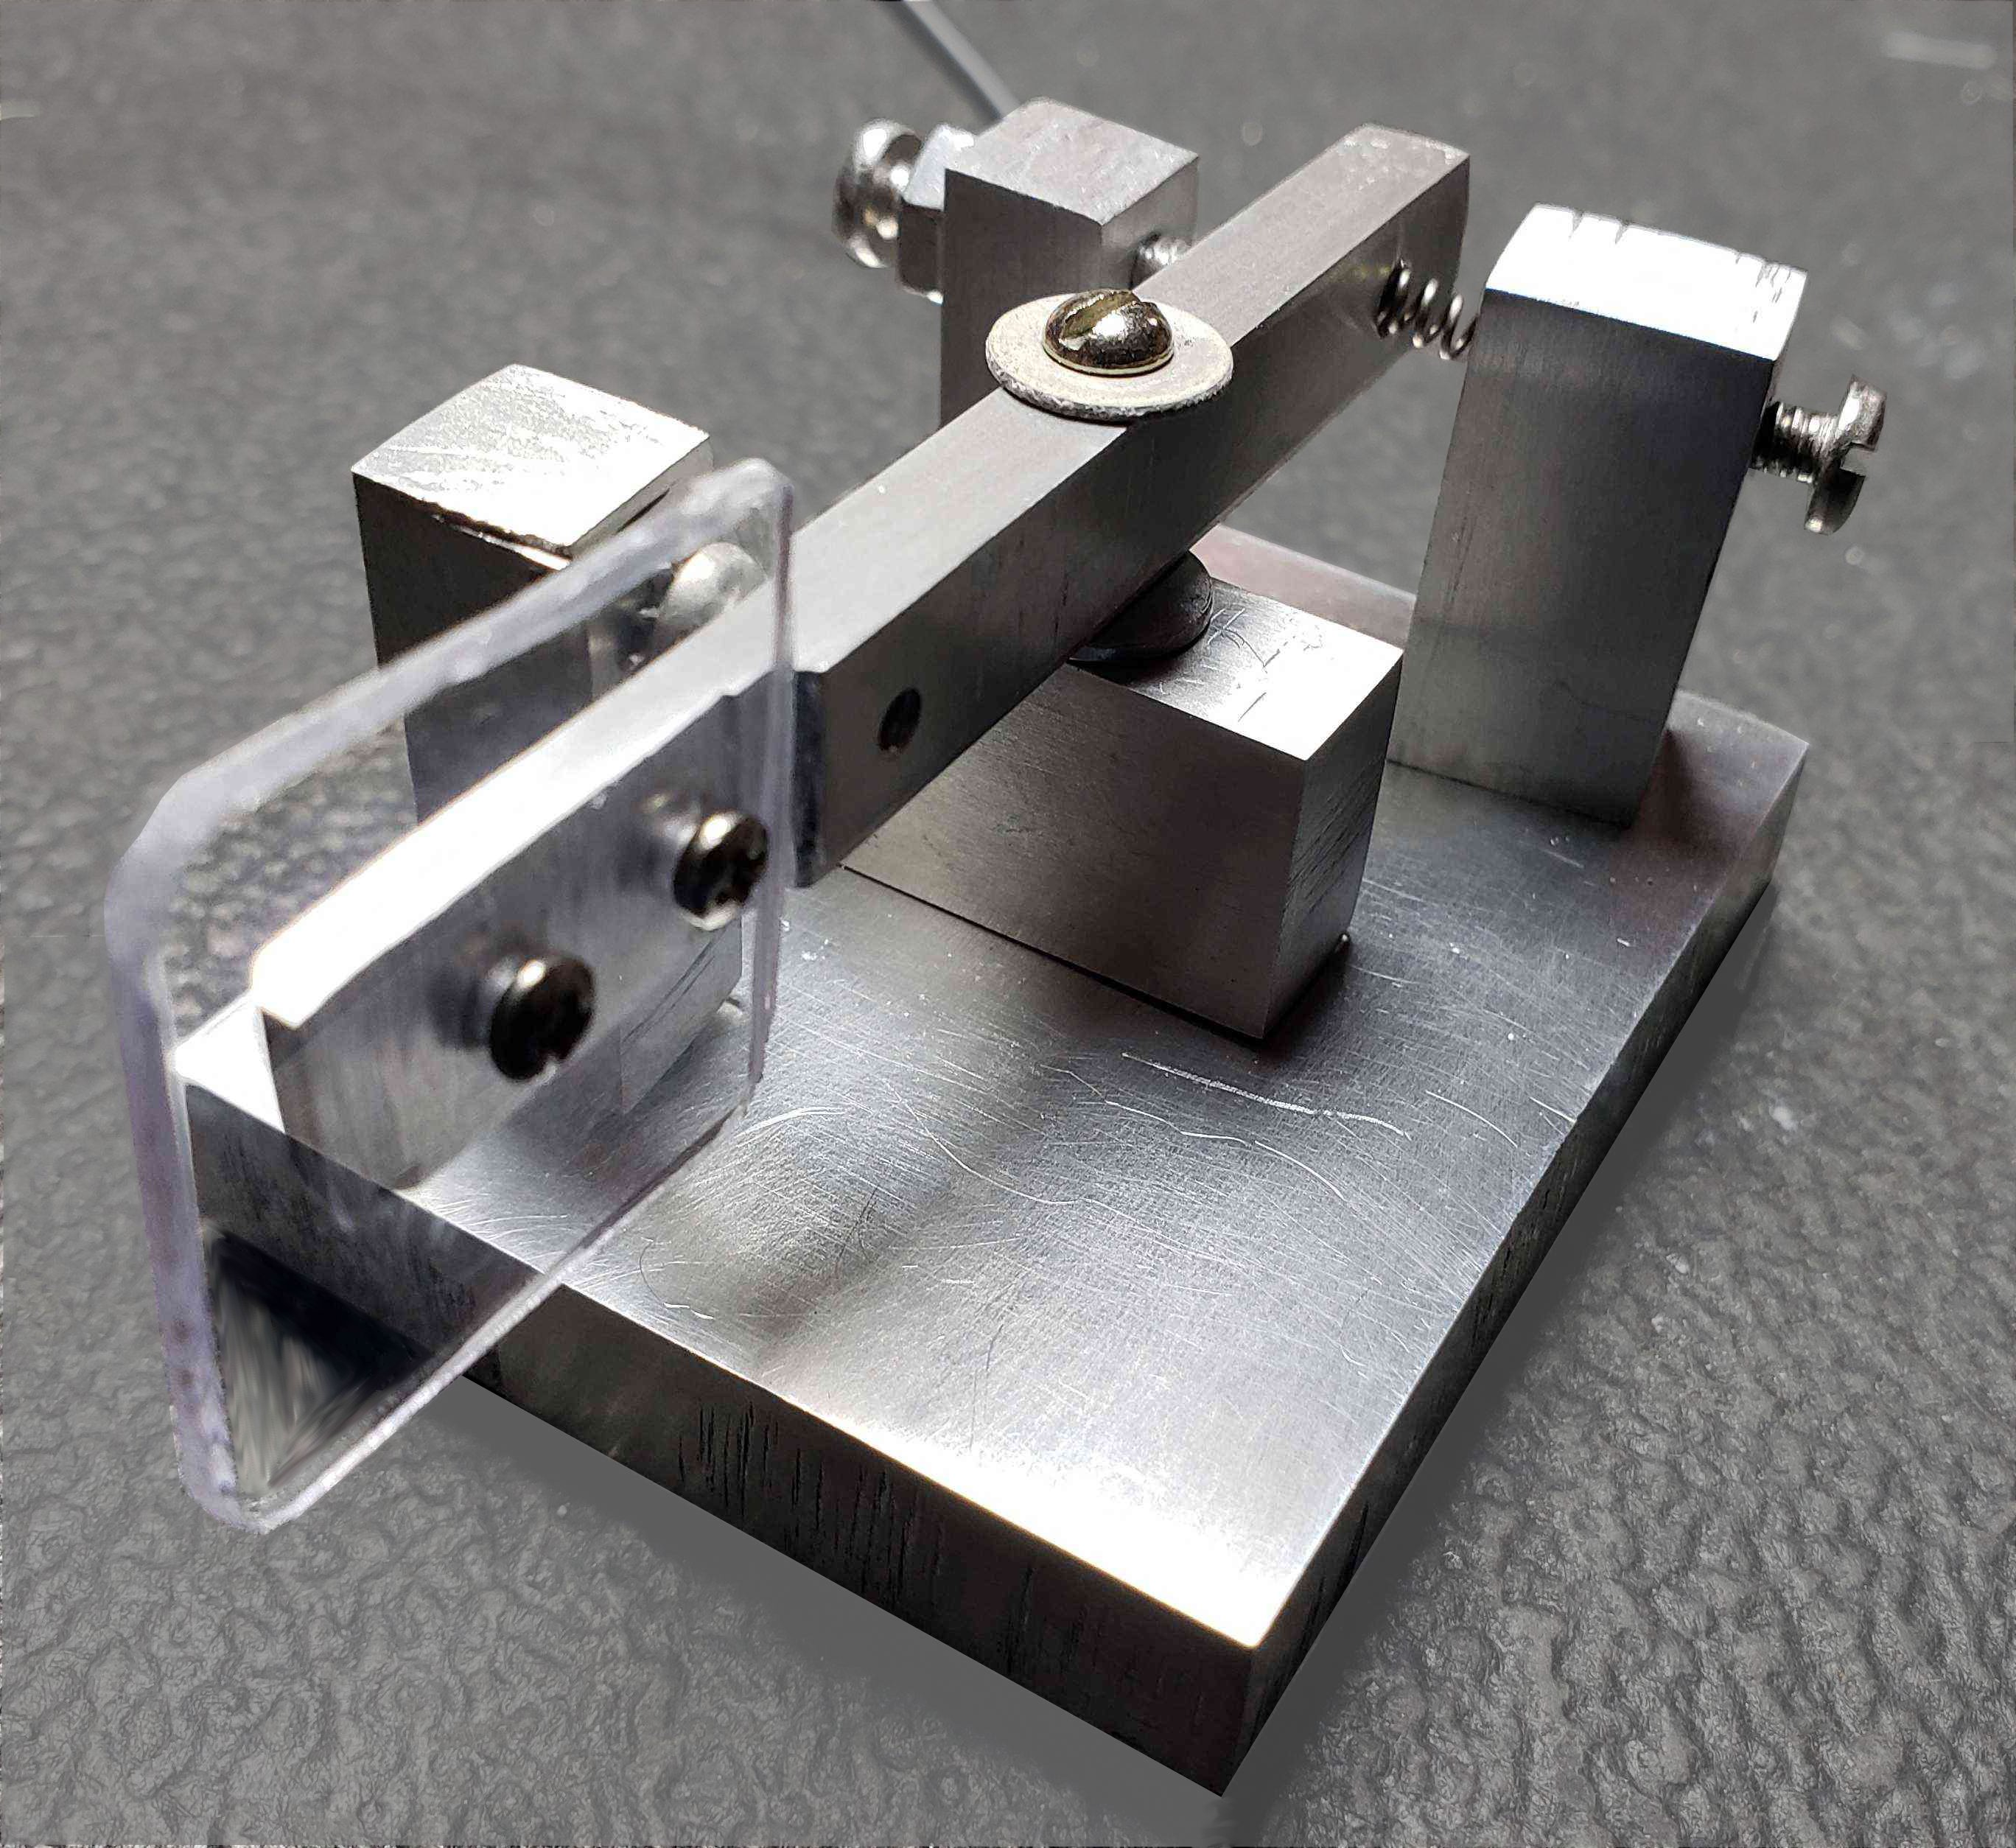
I applied that concept to hand keying by making my own vertical CW Straight key.
About the time I started this project, I discovered an on-line 3D modeling program called OnShape. You must register, and unless you're willing to pay for the service, your projects must remain public, but it acts almost exactly like Soldiworks which I already know. It's incredibly powerful and useful. I used it for my design. Since this project was a sort of collaboration between paper design and actual metal, I didn't bother to put screws or the spring on the drawings, just the metal so I had an idea where and how I wanted it placed on the base.
I was lucky enough to have picked up some junk blocks of aluminum years ago. I cut one of the blocks into 3/8" by 3/8" strips on a bandsaw for the various elements, and cut one block to size for the base. I then added those shapes to the 3D drawing and used it to tell me the basic shape of the key. Precise placement was up to "cut and try", then fed back to the drawings. Ultimately, after a couple of false-starts, this project came together.
As shown, the action feels "mushy" to me. I believe it's because the contact block is held by one screw and is narrow; allowing it to move slightly, to "rock" to the side when contacted. Some day I plan to make it much wider to prevent it from rotating away from the arm when contact is made.
**Later: I replaced the contact block and its insulation scheme. I made the block rectangular so it can't "rock" as much, and instead of using shoulder washers on both the top and bottom of the base, I used a shoulder washer on the bottom to center the mounting screw in the hole on the base (to prevent the screw from touching the sides of the mounting hole on the base), and used a TO-220 insulator on the top of the base to insulate the contact block while maintaining a large surface area; again, to prevent the block from "rocking" when being contacted. Now it feels much more "crisp" and precise.
The drawings below are NOT accurate. They are simply starting points to show how the various parts assemble together to make the final key. If you try to recreate this project, you will have to decide hole and fastener placement yourself.